No items
in basket
| Tags | walk-in bath bath easy riser montana priya tray sizes anti-slip shower tray sizes shower tray freestanding baths geberit aquaclean aquaclean carron corner bath carron baths show all posts |
Published: 19/08/2024
Expert Backed Guide to Re-Sealing a Shower Tray: A Step-by-Step Tutorial
Re-sealing a shower tray is an important job that will protect your bathroom from water damage and mould growth and make it last longer. If you know how to do this right, you can save time and money in the long run, whether you are remodelling your bathroom or just keeping it in good shape. This guide will show you how to reseal your shower tray step by step, giving you all the information you need to feel confident about your work.
Step 1: Preparation
Get Your Tools and Materials Ready.
Before you start resealing your shower tray, you need to make sure you have all the materials and tools you need. What you'll need is:
High-quality silicone sealant: Choose a sealant that is good for bathroom use, ensuring it offers mould resistance and waterproof properties.
Silicone sealant remover: this will help you get rid of the old sealer well.
Masking tape: To cover nearby areas and make sure the finish is clean and sharp.
Caulking gun: For spreading the new sealant smoothly and evenly.
Utility knife or scraper: Essential for cleaning the old sealant.
Cleaning cloths and rubbing alcohol or a good cleaner: For cleaning the surfaces before applying new sealant.
Safety Precautions
When dealing with chemicals and sharp tools, safety is very important. Make sure to:
Wear gloves to protect your hands from strong chemicals and sharp edges. To avoid breathing fumes from the sealant and remover, make sure the bathroom is well-ventilated.
These beginning steps set the foundation for a successful re-sealing project. By preparing effectively, you ensure that the subsequent steps can be finished smoothly and safely.
Step 2: Removing Old Sealant
Clear the Area
Before you begin, it's important to clear the area around the shower tray. Remove any bath mats, toiletries, or removable shower accessories to ensure you have clear access to the full perimeter of the shower tray. This step is crucial for enabling a thorough and unhindered sealant removal process.
Loosen the Old Sealant
Apply a silicone sealant remover along the current sealant line. Be generous but precise—ensure the remover fully covers the old sealant without spilling over onto other areas. Follow the product instructions to allow the remover to sit for the suggested time. This waiting time allows the chemical to penetrate and soften the sealant, making it easier to remove.
Remove the Old Sealant
Once the old sealant has softened, use a utility knife or scraper to slowly peel and scrape it away. Start at one end and work your way along the seam, taking care not to scratch the surface of the shower tray or the walls. Remove all traces of the old sealant, as any residue can prevent the new sealant from adhering properly. This step might take patience and attention to detail to ensure a clean, smooth surface for the new sealant.
Step 3: Inspect the Shower Tray
Check for Movement
With the old sealant removed, it’s a good chance to inspect the shower tray for any signs of movement. Press the tray down and around, paying particular attention to the corners and edges. Movement here could indicate that the tray is not properly protected, which can lead to breaks in the sealant over time. If you notice any movement, address these issues by securing the tray more firmly before proceeding. This might involve adjusting the supports underneath the tray or adding new fasteners to ensure steadiness.
Step 4: Cleaning the Area
Clean the Edges of the Shower Tray
To ensure optimal adhesion of the new sealant, start by using rubbing alcohol or a suitable cleaner to carefully clean the edges where the new sealant will be applied. It's important that this area is free from any dust, soap scum, or oily residues. After cleaning, take a dry cloth and wipe down the area to ensure it is perfectly dry.
BSO Top Tip
BSO Top Tip: Expert Recommendation for Drying
Here at Bathroom Supplies Online, our fitters and experts who routinely handle installations suggest allowing the shower tray to air dry for several hours after cleaning. This practice, often ignored in standard guides, ensures that no hidden moisture remains that could undermine the effectiveness of the new sealant. Allowing the tray to dry fully helps in making a stronger bond between the sealant and the surface, which enhances the durability and efficacy of the sealant.
Step 5: Applying Masking Tape
Protect the Surrounding Area
Carefully place masking tape along the edges of the shower tray and adjoining walls. This tape works as a guide for where to apply the sealant and ensures that you achieve straight, clean lines in the final application. Make sure to leave a gap of the proper width for the new sealant—usually about 3-5mm. This gap is where you will put the sealant in the next step.
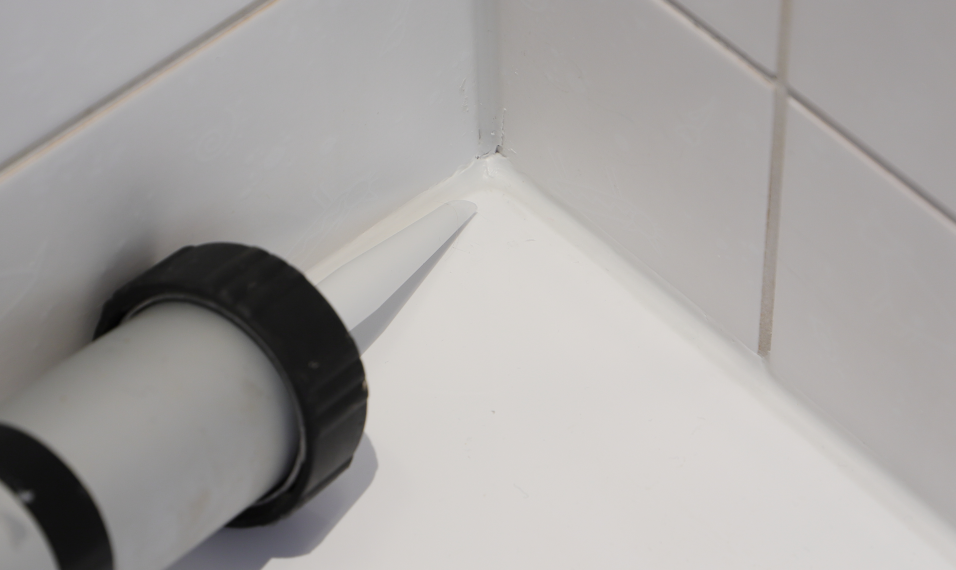
Step 6: Applying New Sealant
Prepare the Caulking Gun
Before putting on the new sealant, prepare your caulking gun. Cut the tip of the silicone sealant tube at a 45-degree angle to meet the desired bead size. This position allows for a smoother application and helps control the flow of the sealant. Insert the tube into the caulking gun and ensure it is secure to avoid any slips during application.
Apply the Sealant
Begin by placing the tip of the caulking gun at one end of the masking tape line. Press the trigger slowly and move the gun along the tape line at a steady pace. This ensures a continuous bead of sealant is spread along the edges of the shower tray. Keep the bead even, trying to fill the gap between the tapes without creating spaces or bubbles. This step is crucial for getting a watertight seal, so take your time to ensure a smooth, consistent line.
Step 7: Smoothing the Sealant
Tool the Sealant Bead
Once the sealant is applied, quickly smooth it out. You can use a wet finger, a sealer smoothing tool, or even a lolly stick if a specialised tool isn't handy. Dip your tool or finger in soapy water to avoid sticking, and drag it along the bead of sealant. This helps press the sealant tightly into the gap, ensuring full contact with both surfaces and a smooth, clean finish that's free from peaks or troughs.
BSO Top Tip: Using a Lolly Stick
We suggest using a lolly stick as an effective alternative to commercial smoothing tools. This handy tip from our seasoned fitters provides a budget-friendly solution that gets a professional-level finish. The flat, smooth edge of a lolly stick is perfect for making an even sealant line that adheres well and looks great.
Step 8: Finishing Up
Remove Masking Tape
Carefully remove the masking tape while the sealer is still wet. This prevents the sealant from curing to the tape and possibly pulling away from the surface when the tape is removed. Peel the tape off slowly and at an angle, ensuring that the newly applied sealant stays intact and has clean, sharp edges.
Allow the Sealant to Cure
Follow the manufacturer's instructions for the curing time, which usually runs from 24 to 48 hours. During this time, it's important not to use the shower or expose the sealant to moisture. Allowing the sealant to cure undisturbed guarantees maximum durability and effectiveness.
Step 9: Inspection and Clean-Up
Check the Seal
After the curing period, inspect the sealant line carefully for any gaps, bubbles, or uneven areas. If any imperfections are found, apply additional sealant as needed before the sealant fully sets. This final check ensures that your shower tray is completely sealed and ready for use.
Clean Tools and Dispose of Waste
Finally, clean all the tools used during the application with a suitable solvent, and dispose of any waste materials, including old sealant and empty silicone tubes, properly. Keeping your workspace clean and disposing of materials responsibly is essential for safety and environmental care.
Quick Summary: How to Reseal a Shower Tray
1. Prepare Your Workspace and Gather Materials
Collect materials like high-quality silicone sealant, sealant remover, masking tape, caulking gun, utility knife or scraper, cleaning cloths, and rubbing alcohol.
Ensure safety by wearing gloves and ventilating the area.
2. Remove Old Sealant
Clear any items from around the shower tray.
Apply sealant remover and let it sit as instructed.
Use a scraper or utility knife to remove all the old sealant.
3. Inspect and Prepare the Shower Tray
Check for any movement and ensure the tray is securely fitted.
Clean the tray edges with rubbing alcohol or cleaner and let them dry completely.
4. Apply Masking Tape
Tape around the tray to ensure straight lines for the sealant.
5. Apply New Sealant
Cut the tip of the sealant tube, load it into the caulking gun, and apply it evenly along the tray edges.
6. Smooth the Sealant
Use a wet finger, a smoothing tool, or a lolly stick to smooth the sealant.
7. Finish Up
Remove the masking tape while the sealant is still wet.
Allow the sealant to cure as per the manufacturer’s instructions before using the shower.
8. Inspect and Clean Up
Check the seal for any gaps or uneven areas, and touch up if necessary.
Clean your tools and properly dispose of waste materials.
Step 9: Inspection and Clean-Up
Check the Seal
After the curing time, inspect the sealant line carefully for any gaps, bubbles, or uneven areas. If any imperfections are found, apply extra sealant as needed before the sealant fully sets. This final check ensures that your shower tray is fully sealed and ready for use.
Clean Tools and Dispose of Waste
Finally, clean all the tools used during the application with a suitable cleaner, and dispose of any waste materials, including old sealant and empty silicone tubes, properly. Keeping your workspace clean and disposing of materials responsibly is important for safety and environmental care.

Questions & Answers
How often should I reseal my shower tray?
It's recommended to reseal your shower tray every one to two years, based on usage and exposure to cleaning chemicals. Regular inspection for signs of wear, such as peeling or mould, can help determine the right time to reapply sealer.
What are the signs that my shower tray needs resealing?
Key signs include discolouration, mould growth along the sealant lines, and noticeable holes or cracks. If the sealant is peeling or no longer adherent, it's time to reseal to avoid water damage.
Can I reseal my shower tray myself, or should I hire a professional?
DIY resealing is manageable if you follow a step-by-step plan and use the right tools and materials. However, for large jobs or if unsure, hiring a professional ensures a thorough and lasting seal.
What type of silicone sealer is best for a shower tray?
Use a silicone-based sealant specifically made for bathrooms, which offers mould and mildew resistance and adheres well to wet areas.
How do I properly remove the old rubber from my shower tray?
Apply a silicone sealant remover and allow it to sit according to the product's directions. Then, use a scraper or tool knife to gently remove the old silicone, ensuring not to damage the surface of the shower tray.
What are the steps to prepare a shower tray before resealing?
First, clean the area carefully with a suitable cleaner, like rubbing alcohol, to remove any residue and debris. Next, ensure the area is dry and free from moisture. Finally, put masking tape along the edges to achieve neat, straight lines of sealant.
How long does it take for shower tray sealer to dry?
Typically, it takes about 24 to 48 hours for the sealant to fully dry. Check the manufacturer’s instructions for exact drying times. It's important not to use the shower during this time to ensure the sealant sets properly.
What should I avoid doing after resealing my shower tray?
Avoid using the shower or introducing the new sealant to water before it has fully cured. Also, refrain from cleaning the area with harsh chemicals that can compromise the integrity of the new sealant.
Stay Connected
Opening Hours
Mon to Fri 9:00am - 5.00pm
Shop with confidence

© Copyright 2018 Bathroom Supplies Online ~ Company No. 5591519 | VAT No. 883 1161 27 ~ Sitemap
